Learning Bubble.io means getting used to a whole new terminology. While the meaning of workflows and actions in Bubble may seem self-explanatory, it’s still helpful to get a clear definition of these basic concepts to aid you in future learning and discussion. Bubble’s engine is built in JavaScript, which means that all actions that you add to your app are in reality small snippets of JS that perform different calculations and tasks.
What are Workflows in Bubble?
Developing Bubble applications is based on workflows. A workflow is a collection of actions. A workflow doesn’t do anything on its own, but only exists to contain a sequence of actions that are triggered by some event, such as a button being clicked or a condition being true.
What’s the difference between a workflow and an event?
An event is whatever triggers the workflow to run. This can be the click of a button, the changing of an input value or any other condition you set up. As soon as an event is triggered, the workflow will execute all of its actions.
In this way, you can see a workflow as the combination of an event that triggers a collection of actions.
What are actions in Bubble?
An action is any single operation that you place within a workflow. They can be performed server-side (making changes in the database) and client-side (hiding/showing elements, animations, etc) and will in most cases run in the order that you place them in the workflow sequence.
Do actions run in the order you place them in the workflow?
Mostly, yes. But some developers are confused at times when actions seem to not run sequentially – and they’re right. Bubble does change the sequence at times for different reasons, mostly related to performance. In most cases this is fine, but in some cases you’ll want to retain absolute control over the sequence of the actions. Let’s have a quick look at a few guidelines to be aware of.
- Actions run in sequence, but do not wait for the previous step to be completed before moving on to the next
- If an action relies on a Do a search for, and that search is affected by a previous step, the server may not have enough time to update the search result before that action runs: in other words, you should not rely on Do a search for if the result of that search relies on a previous action
- API Workflows are scheduled immediately – regardless of their place in the sequence
- Make changes to a Thing actions are combined into a single action where possible, to avoid having to send multiple commands to the server
How can I force the actions to run in the intended sequence?
There are a few different ways to ensure that the workflow runs in the intended sequence or that you can rely on data being updated before an action is allowed to run.
- By using the Result of Step X operator, you can ensure that the action in Step X will finish before this action will run. That way, if Step Y relies on data manipulated in Step X, you can be absolutely sure that Step Y gets the updated data
- Custom events will always be completed before moving on to the next step. In other words, any sequence of actions that you need to complete before moving on to another step can be placed within a custom event
- If you need to know for sure that a set of actions are completed before scheduling an API workflow, you can place the Schedule API Workflow inside of a Custom Event
What’s the difference between server-side and client-side actions?
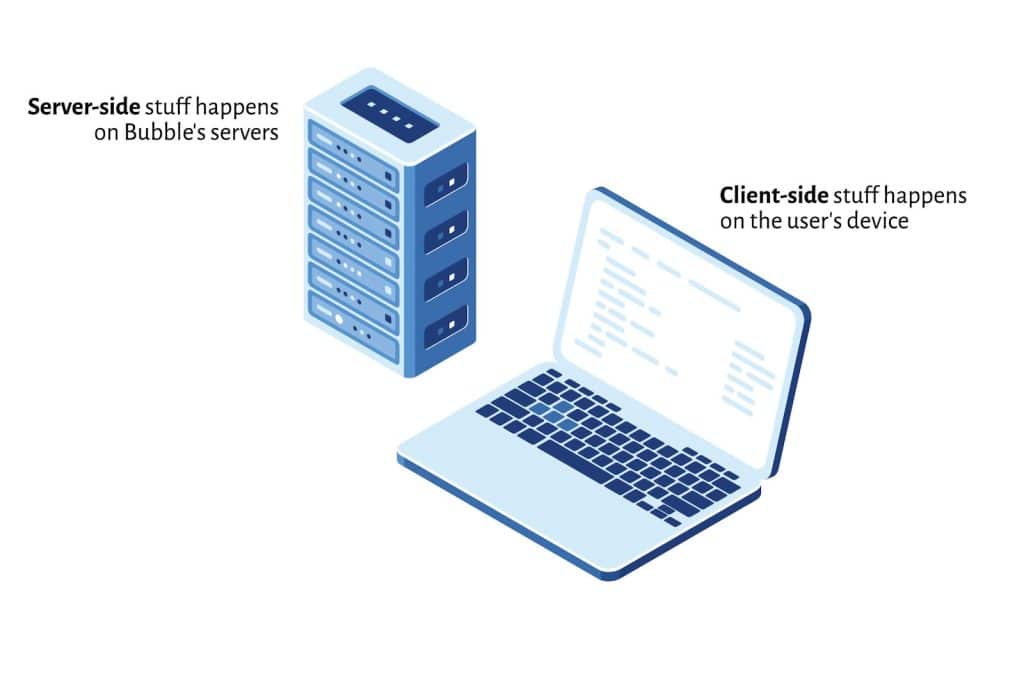
The Bubble engine operates in two places: your browser (on your computer, tablet or phone) and on Bubble’s server. These two sibling engines are constantly in communication with each other to get stuff done, and this is the magic of how Bubble applications work.
The lists below are not exhaustive, but serve as examples to get an understanding of what happens where.

Client-side means anything that happens on your device, without having to communicate with the Bubble server. These actions could be executed even without a network connection, and are usually related to stuff happening on the page. They’re also lightning fast, since they don’t need to wait for information to go back and forth between the device and the server. Examples of client-side actions:
- Hiding/Showing/Toggling elements on the page
- Animating elements
- Setting custom states (as long as it doesn’t rely on data from the database)
- Scroll to
- Go to page (the action is performed client-side, but the loading of the page requires a server connection)
Server-side means any action that needs to communicate with Bubble’s server to work. All database operations are handled on the server, as are a range of other actions:
- Creating, Deleting or Making changes to a Thing (everything that touches the database happens server-side)
- Display data and Display list
- User actions (sign up/log in/log out)
- Scheduling API Workflows
- Send email
As you can see, there’s a fairly simple logic as to how server-side and client-side actions are different. As long as the action needs to communicate with 1) the database or 2) the Bubble server engine (such as scheduling an API workflow) or 3) an external service (such as an email sending service) it needs to be completed server-side.
Client-side actions are performed purely with JavaScript code, while Server-side actions also contain an API call to the server needed to perform the action (usually the Bubble server).
What does an action sent to Bubble actually look like?
Now this section is for those who are curious about what’s actually going on under the hood: it’s not necessary to know this to create a Bubble application. But if you feel like learning what the Bubble engine on your device actually does, then read on.
Any action that’s sent to Bubble’s server (server-side action) becomes a part of your browsers network traffic. This is a term that describes all communication that goes on between your browser and any other device (usually a server) that it communicates with. When the information is transmitted over the internet, it is encrypted, but you can have a look at its content in Chrome Developer Tools. If you want to learn more about that, we have an in-depth guide on DevTools and Bubble.
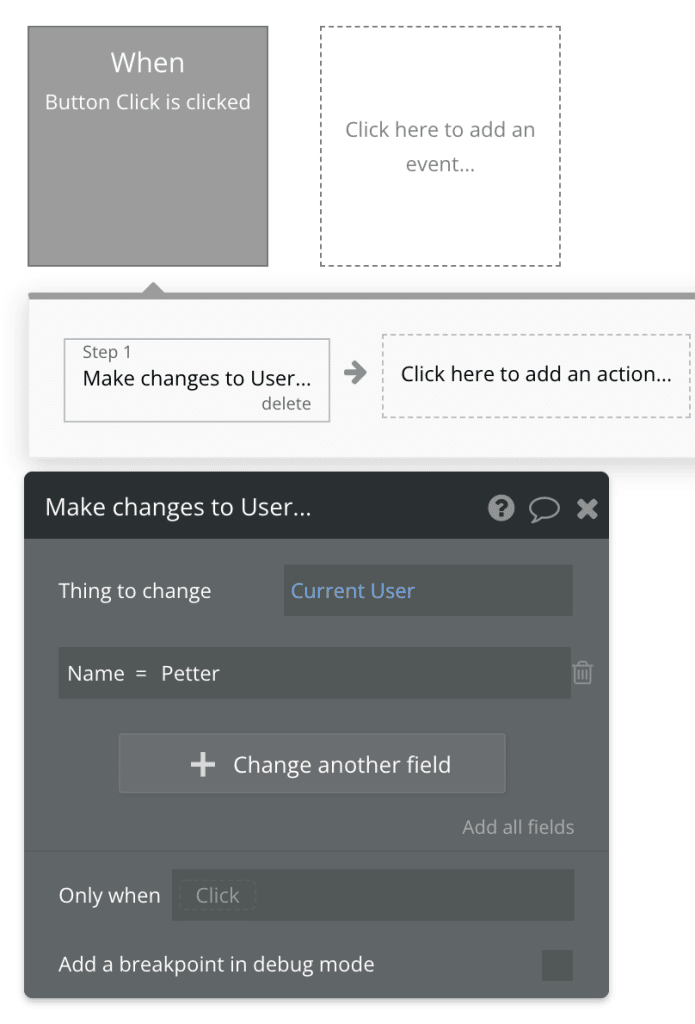
Let’s send this simple action to the server, and then inspect our network traffic to see what that action looks like:

If you open up DevTools, you’ll find the network traffic by:
- Opening up the Network tab
- Filter the requests by Fetch/XHR (this filters the traffic by server communication)
- Look for the request called start

If you look at the Header of this request, you’ll see that the workflow is an API workflow sent to the following URL:
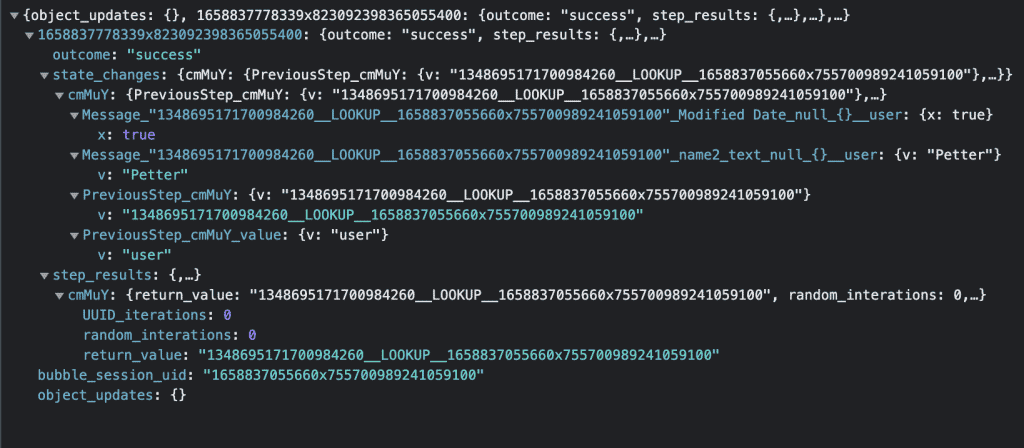
https://yourappname.bubbleapps.io/version-test/workflow/startThe request method is POST, since we’re trying to make changes in the database. If you look into the Preview tab, you can see the details of the communication with the server:

Now, unless you come from a coding background, the kind of confusing gibberish above may be exactly the reason why you chose to use Bubble in the first place. But again, don’t worry, you don’t need to understand this stuff: Bubble takes care of it all for you.
But, there’s another interesting detail here that teaches us something about how Bubble works its magic. If you checked this out in DevTools for yourself, you may have noticed that right after the start request was initiated, Bubble sent another request: mget.
This is because the name of the Current User changed, and the mget request is another API call where the Bubble engine on your device is asking the Bubble engine on the server for updated information about the Current User.

Conclusion
Events, workflows and actions are the building blocks that makes your app do stuff. Whenever you build some sort of logic in the workflow editor, you are using the same logic:
Trigger → Workflow → Action
A trigger (such as a button being clicked) kicks off a workflow that contains one or more actions. Some actions are performed client-side, while others require communication with the server and are performed server-side.


